Maintenance Support
Velocity Micro's award winning Customer Care, the premier source for information on your Velocity Micro PC. To help answer your questions and address support issues, our team of experts have compiled this library of walk-throughs, downloads, and FAQs. This information is updated, expanded, and refined on a daily basis to ensure you have the very latest information available.
Skip to
Grounding yourself before working on any computer-related task
Any time you touch an ESD sensitive component without properly grounding yourself, you run the risk of creating hardware problems where there were none before. From as little as making something sporadically malfunction without any rhyme or reason to it, all the way to completely "killing" a piece of hardware.
CPU's, motherboards, memory and PCI/PCI-e cards are the most vulnerable, but power supplies, optical drives, hard drives and anything else are still at risk. Grounding yourself is important to mitigate the risks outlined previously. It is also possible that if you send an electro static charge to a component in the computer while it is turned on, it could cause the power supply to short and in rare cases a fire could be created at the power supply or wall socket where the computer is plugged in.
Common Methods for Grounding Yourself
- Anti-static wrist straps – with this method you are grounded 100% of the time, it's not possible to discharge electro static energy to the computer because it is discharged through the metal contact point on the strap.
- Grounded ESD mats (for the work bench, not the floor) – ESD mats or flooring are only truly effective if those mats are grounded, this method should be used in conjunction with #1.
- Anti-static floor mats, simple rubber flooring is NOT ESD safe – better than carpet, but does not prevent static electricity from building up.
- "Discharging" yourself by touching a piece of metal or the case.
A key element commonly disregarded in ensuring you and your computer remain safe from ESD is humidity. Dry atmospheres lend themselves to allowing electro static energy to be accumulated, adding a humidifier to a room or production facility is extremely beneficial in ensuring ESD safety.
How to open your case to access the inside
Sometimes it may be necessary to access the internals of your Velocity Micro computer, whether it’s to add a new hard drive or video card or to troubleshoot the memory or pop out the CMOS battery. Our larger cases are fairly easy to get into while our smaller ones can be a tight fit. If you feel uncomfortable at all while attempting to access the internals, we strongly recommend calling our support team and arranging to send it in for repair. While you are free to take your computer to a local shop, Velocity Micro will not cover any work done by them.
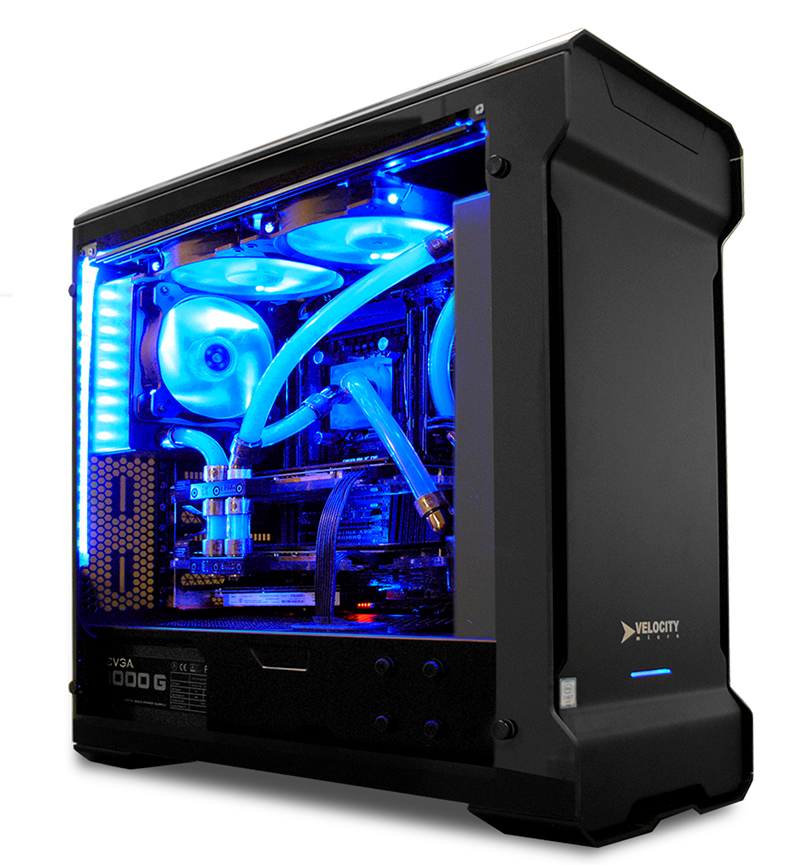
VX and PX Case
Unlike most of our other cases, the VX has a tempered glass panel on both sides. Even though tempered glass is tougher and more shatter resistant than normal glass, it is still glass and should be treated delicately. There are 4 thumb screws in each corner that hold the panel in place. Once all 4 are removed, simply grip the top and bottom of the panel and pull towards yourself. Place the panel off to the side on a surface that won’t scratch it. To put the panel back on, simply align the 4 mounting holes and tighten the 4 thumb screws. Repeat for the back panel if necessary.
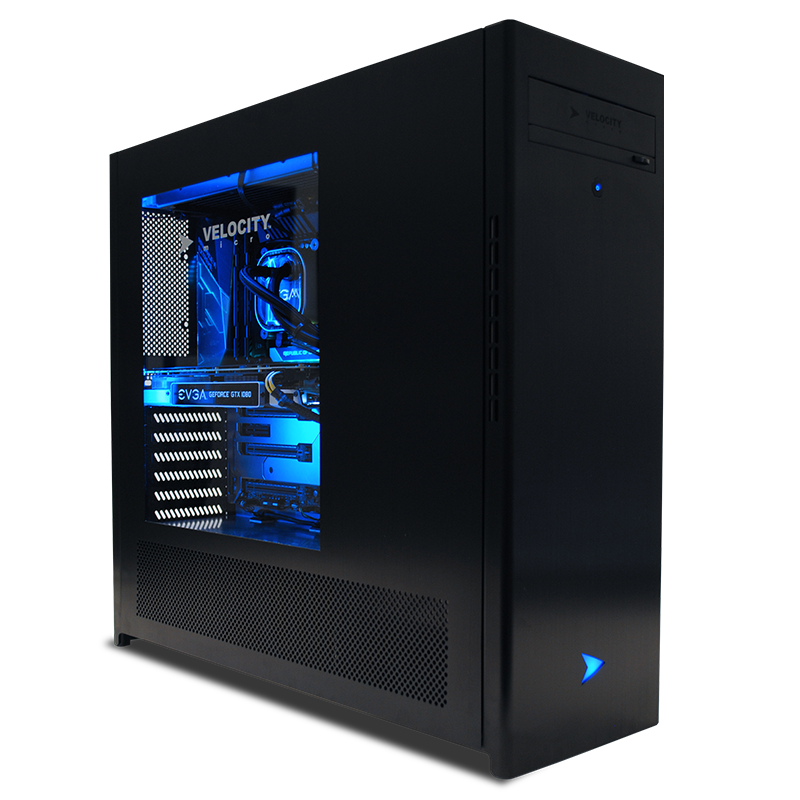
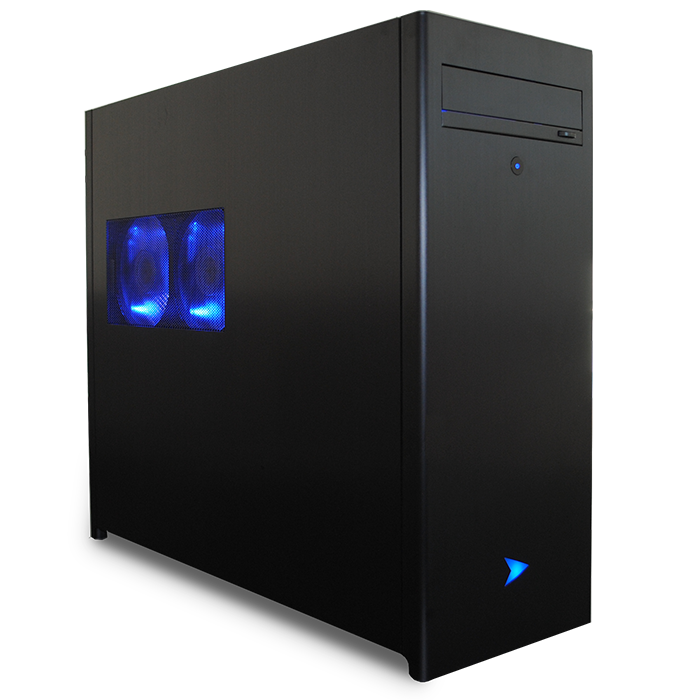
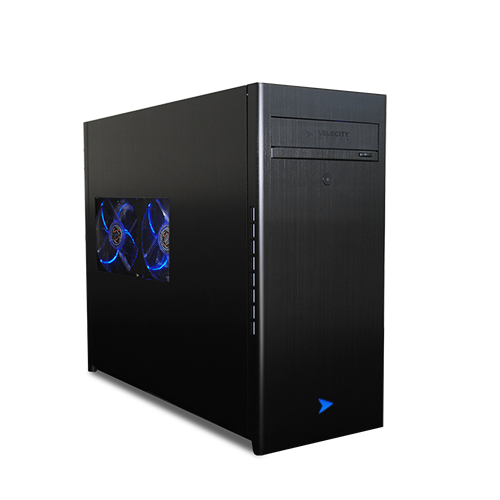
GX and MX cases
Both the GX and MX cases have tool-less panels on one side for convenience, so the removal procedure is exactly the same for all. To remove the side panel, take one hand and put it underneath the bottom lip of the case and pull it towards you. The panel is held in place by plastic clips all around the edge of the case. To pop out the rest simply slide a hand around the edges until the panel comes free. On the GX4 and MX3 there is a side door that allows for the installation of two additional fans or holds the 240mm radiator if you have a liquid cooler. On the right-hand edge of the door you will see three silver thumb screws. The top and bottom hold the door in place; the middle one holds the hard drives in place. We can leave the middle one alone for now and just undo the top and bottom ones. Once unscrewed, the door can swing out to the left and allow for easier access to the RAM, CPU, and video card.
To remove the back panel to access any cabling or wiring, you will need a small Phillips head screwdriver. There is a screw at the center top and center bottom of the panel that need to be removed before the back can come off. Once they are removed, the back panel comes off the exact same way the front panel. To put either panel back on, simply align the pegs on the back of the panel with the clips in the case.
NX and Smallblock
Our NX and Smallblock (SB) cases both have side panels that are easily removed, however the interior of both cases can be harder to work in. To remove the side panel on either, simply undo the Phillips head screw at the top of each panel and lift the panel straight up and pull away from the case. With the NX case there is room enough to do some light troubleshooting work such as reseating a RAM stick, however it may be a very tight fit based on your configuration. The internals of the Smallblock are essentially inaccessible without removing the power supply, and as such we do not recommend attempting any troubleshooting. We strongly suggest contacting our support team for further assistance.

How to replace a CMOS battery
Estimated difficulty and completion time: 15 minutes to remove the battery if it's easily accessible, an hour to let the board drain, low to moderate difficulty depending on how easily accessible the CMOS is.
CMOS batteries – the circular battery on your motherboard which helps store your PCs most basic settings - do eventually drain and will be no longer able to hold a charge. This usually occurs in older PCs. If the battery is losing its charge, you will get messages on boot up saying things like "CMOS/BIOS has been reset" or "Default values have been loaded" and the time and date may be incorrect. If this continues to happen, it may be time to buy a new battery. CMOS batteries are often called "coin cell batteries" or "watch batteries" and are fairly easy to find at most stores in the battery section by simply matching up the model number on your current battery. For more information on how to physically remove and install this battery, please see our guide on resetting the CMOS.
Once the new battery is in place, power the system on and go to the BIOS. The first thing you should do is set the correct date and time for your time zone. One thing to remember is that most BIOS do not operate using AM/PM format, but rather use 24 hour or military time. Setting the time and date is important, as having the wrong time and date can interfere with some programs, particularly Windows Updates. There are other settings that need to be changed as well. Normally, when a system leaves Velocity Micro there are several profiles saved that have our optimized settings. Since the CMOS has been cleared, however, these settings are gone and need to be reapplied. There are a wide variety of settings that can be applied that depend on both the motherboard and the CPU. We strongly suggest calling our support line for assistance.
NOTE: If your system was overclocked, resetting the CMOS will remove the overclock. As a matter of policy, we do not give overclocking instructions by phone or email. There are too many variables involved and incorrectly attempting an overclock can cause permanent damage to your system.
How can I free up some Hard Drive space?
It's very important to keep your C: drive with as much free space as possible. While the system can continue to function with low space on C:, it can prevent Windows from updating and leave no space for temporary files. There are a few ways to clear up space for C: in Windows 10.
The first method is to run Disk Cleanup, which is already built into Windows. Start by left clicking on the Windows logo (Start Menu) in the bottom left of your screen and typing "Disk Cleanup." Press enter to run it and a window will pop up on your screen.
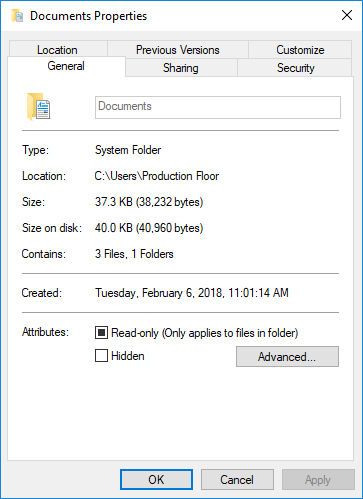
NOTE: by default Disk Cleanup will run on your C: drive. If you need to run it on other drives, you can do so by going to "This PC" in File Explorer and right clicking the drive and selecting Properties. Disk Cleanup will be on the right side of the General tab.
Disk Cleanup will show what can be deleted and how much space will be freed. Be aware that this will permanently delete files, so be sure that you are choosing the right options. If this doesn’t free up enough space, you can click on the option to "Clean up system files." Disk Cleanup will then rescan your system and relaunch with more options. The most important things to look for are Windows Update Files and Previous Windows Installations. Old Windows Installations can take up many gigabytes of space. Once you've decided what to clear up, press "OK" to run. You will be prompted to confirm one more time. Remember, this will permanently delete files. It may take a few minutes to finish, but once it's complete go ahead and reboot your system. Once back in Windows, check to see how much space has been recovered.
Another program that can free up disk space is a 3rd party application called CCleaner. You can download a free version here. CCleaner works similarly to Disk Cleanup but has more control over what gets deleted and can also clean up cache and temporary files for third party programs. CCleaner can also clean up the registry, though in Windows 10 the registry is far less important than it was in Windows 7 or XP.
You can also free up space by moving entire folders to your secondary or storage drive (if applicable). By default, Windows downloads and installs everything to the C: drive, but by using folder redirection to change the default locations for some folders such as Downloads and Music, you can free up your C: drive significantly. To do this:
- Go to File Explorer and right click on the folder you want to move, e.g. Downloads.
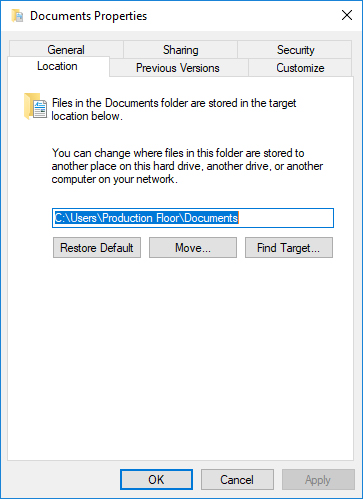
- Choose Properties at the bottom and then choose the Location Tab.
- Click the button that says "Move" and then select the destination. So if you want to move your Downloads folder to your D: drive, double click the D: drive and choose "Select Folder" in the bottom right. If you already have files in your Downloads folder, it may take some time to move them all based on how much needs to be moved. Do this for all the folders you'd like to move.
You can also uninstall programs you don't use anymore. For help with uninstalling old programs, see our guide on how to do that.
How can I load programs and files faster?
There may be times when you need an application to launch faster or have faster access to files and folders. For the most part, this can be achieved by installing important programs and keeping important files on an SSD rather than a mechanical drive. By default, Windows always installs programs to your C: drive, regardless of whether or not it’s an SSD. You can change the default install and download locations, but we’ll get to that later.
Benefits of a Solid State Drive
The most obvious benefit is speed. Since SSD’s are much faster than conventional drives, there is little to no latency when starting a program or accessing a file. The downside is you have to be careful about how much you put on your SSD since space is more limited than a conventional drive. The best setup is to have a fast SSD as your main C: drive for Windows and programs that you want to run quickly and a mechanical secondary drive for large files and programs that don’t really benefit from being on an SSD. This guide will help you decide which programs you should or should not install to an SSD.
While not all programs will benefit from running from an SSD, examples of ones that would include video and audio editing software, web browsers, and games, particularly online games. Single-player games won’t get many benefits aside from loading faster, but multiplayer games will benefit greatly from being on an SSD. Bear in mind that many games, especially AAA titles, can easily approach 50 GB or more in size. Also, if you do any kind of video capture through a capture card, having the capture go to the SSD first and then to a mechanical drive will ensure you don’t lose any footage, especially when recording 4K video.
Changing the Default Install Location
We mentioned earlier that Windows, by default, will save and install everything to your C: drive, regardless of its size. Fortunately, this is easy to change. We’ll go over changing default install locations first. On your secondary drive, create two folders, one called “Program Files”, and the other called “Program Files (x86).” Now, whenever you install a program, instead of the default path “C:\Program Files\” you can choose “D:\Program Files\.” You can do this for as many programs as you need to. Games can work a little bit differently, especially if you’re using a game client like Steam or Origin. You can still configure these clients to use a different install location, and Steam can even have multiple install directories. This can be set through each client’s settings.
Next, we’ll go over folder redirection. Ever since Windows 7, Windows has included a system called Libraries (now called Quick Access in Windows 10). These provide quick shortcuts to commonly used folders such as Downloads, Music, and Documents. Not only can you create your own, but these Quick Access folders can include multiple locations, such as a Documents folder on a group drive. To add a folder to a library, simply right click on the folder and choose “Include in Library” and select the library you want to include it in. Now, to change or move a folder’s location, right click on the folder and select “Properties.” Then choose the Location tab at the top and you will have 3 options; Restore Default, Move, and Find Target. Choose Move and a new dialog will open. From here choose the destination drive and folder and press “Select Folder” to confirm. This will move the existing folder to the destination drive and may take some time if the folder has a lot of files. Do this for as many folders as you need to.
Other Options
The last thing you can do to help maintain the speed of your drives is to do regular diagnostics on them. Using Disk Defragment regularly can help clear up bad sectors and keep your data intact. Another way is to regularly clean up temporary files either using Disk Cleanup in Windows or a 3rd party utility such as CCleaner.
How do I practice safe computing to avoid malware?
What's Out There?
Over the past couple years, computer users have become more and more concerned about malware. Malware is made up of several categories of software (described below). Malware destabilizes your system, degrades system performance, reduces program functionality, fills up your hard drive, and clogs Internet bandwidth. Additionally, some forms of malware can disable your system altogether. Read on for the most common types of malware:
Spyware
Spyware refers to small pieces of software, installed with or without your knowledge, that report your Internet browsing habits to a data harvester. Spyware usually comes bundled with "free" software like Kazaa, Morpheus, Grokster, Bearshare, iMesh, Hotbar, and Gozilla. Some of the more rampant pieces of spyware are Gator, SaveNow, New Dot Net, WebHancer, and Xupiter.
Adware
Adware pops up ads while you are connected to the Internet, even if you're not currently browsing. Adware also comes bundled with software programs as described above.
Backdoors
Backdoor programs are installed on your system by hackers and allow users to gain remote control of your system without your consent or knowledge.
Viruses
Most people are familiar with viruses. A virus is a program that propagates within your system, denying access to certain files and generally disrupting your computing experience. Velocity Micro offers McAfee VirusScan and a 12-month subscription on all of its systems.
Trojans
Trojans are special backdoors disguised as useful programs (small games or utilities). When these programs are run, the trojan installs a backdoor program on your system, letting anyone access your system without your knowledge.
Worms
You've probably already heard of some famous worms: ILOVEYOU, Melissa, Klez, Sobig.F, Blaster, Mydoom, Netsky, etc. Worms usually spread via email attachments. The user opens the email attachment and the worm is released on their system, spreading itself via the victim's address book. Worms can also install a backdoor on your system to allow remote access later. Worms are also now spreading to AOL's Instant Messenger service.
Why They Want You
You might say, "Why would a hacker target me? I don't have any secret government files or anything that any hacker would want." That might be true, but if you have a cable or DSL modem, you already have one thing hacker wants: an always-on, high-speed Internet connection. What could a hacker want with your Internet connection?
File Storage
Your system could potentially become a distribution center for pirated software and/or music.
Denial of Service
What happens when ten thousand computers continually request a single website for hours at a time? That website, unable to handle the load of all the incoming requests, crashes and is no longer available online. Using backdoors and trojans to take control of computers with high-speed Internet connections, hackers can group multiple thousands of computers together and issue a Distributed Denial of Service (DDoS) attack to any web server. Thus, your cable modem becomes a weapon against a hacker's target of choice.
What To Do
These descriptions and situations are not meant to scare you into never using your system. You should, however, be aware that malware is out there and very active. Fortunately, there are several things you do can to keep your system free of malware:
Keep Windows Updated
The number one vulnerability to Internet-based exploits is the Windows operating system itself. Regularly check Windows Update to see if Microsoft has issued any new patches for Windows. Select the Start menu, then All Programs, then Windows Update to connect to Microsoft's server. The website will run a small application to scan your system for vulnerabilities. If there are any, you will then be presented with a list of updates to install. Velocity Micro systems ship with the latest Windows updates installed, but new ones are released every so often, so it's important to check regularly.
Use A Firewall
Use a firewall. Firewalls screen incoming and outgoing Internet traffic for malicious content and let you know what programs are trying to access the Internet. Firewalls are available in hardware form (a physical box that sits between your computer and the Internet connection) and software form (a program that runs on your computer). Hardware firewalls are available from companies such as Belkin, D-Link, and Linksys. If you don't want to spend money to get a hardware firewall, you can download Zone Alarm for free. Zone Alarm is a very capable software firewall that runs in your system tray, continuously monitoring Internet traffic.
Be Cautious About Opening Email Attachments
Email worms can "spoof" the name of someone else, fooling you into thinking the email was sent by someone you know (when in reality they had no idea they sent it). Double-check with the sender to see if they actually meant to send you a file. Beware of attached files with the following extensions: .exe, .pif, .vbs, .js, .cpl, .com, or .bat at the end. These file types are executable, meaning they are designed to run programs (and not, for example, open a Word document). Be especially aware of "combination" file names such as .doc.vbs, .jpg.exe, and so forth. If you suspect an email contains a worm attachment, DO NOT OPEN THE ATTACHMENT. Delete the email immediately and remove it from the "Deleted Items" folder.
Use Spyware Detection Software
Programs like AdAware and Spyware Blaster scan your hard drive for malware and remove it or disable it. Malwarebytes is another popular tool. Download these programs, keep them updated, and run them often.
Use An Antivirus Program
Today's antivirus programs can detect worms, trojans, and backdoors as well as actual viruses. Keep your program's definitions updated and scan your system regularly. Programs like Norton Antivirus (offered as an option with Velocity Micro systems) can run constantly in the background, scanning each file as it is accessed. You may also wish to review some of the free options such as Microsoft Security Essentials, AVG, or AVAST. Publishers of free versions do not provide technical support. Publishers of paid versions do.
How do I clear the CMOS (manually reset the BIOS) on my PC?
When a computer fails to POST it can be for a variety of reasons, whether it’s bad hardware or a setting change in the BIOS. Sometimes the only way to get back into the system is by clearing the CMOS and resetting all BIOS settings to default.
CMOS refers to the small battery that sits on the motherboard and supplies a small amount of power to it when the system is powered down or unplugged, and is responsible for making sure the BIOS keeps the correct time and date as well as any overclock settings, among other things. The battery is about the size of a quarter and is the same type that is used in wrist watches. The CMOS is necessary since the part of the motherboard that stores BIOS settings is what’s called volatile memory, meaning it loses its contents when it loses power. The CMOS battery supplies just enough power to prevent that from happening, but it doesn’t last forever and you will eventually start to see messages saying the BIOS was reset to factory defaults. This means you will need to replace the battery, and you can find a guide on how to do that here.
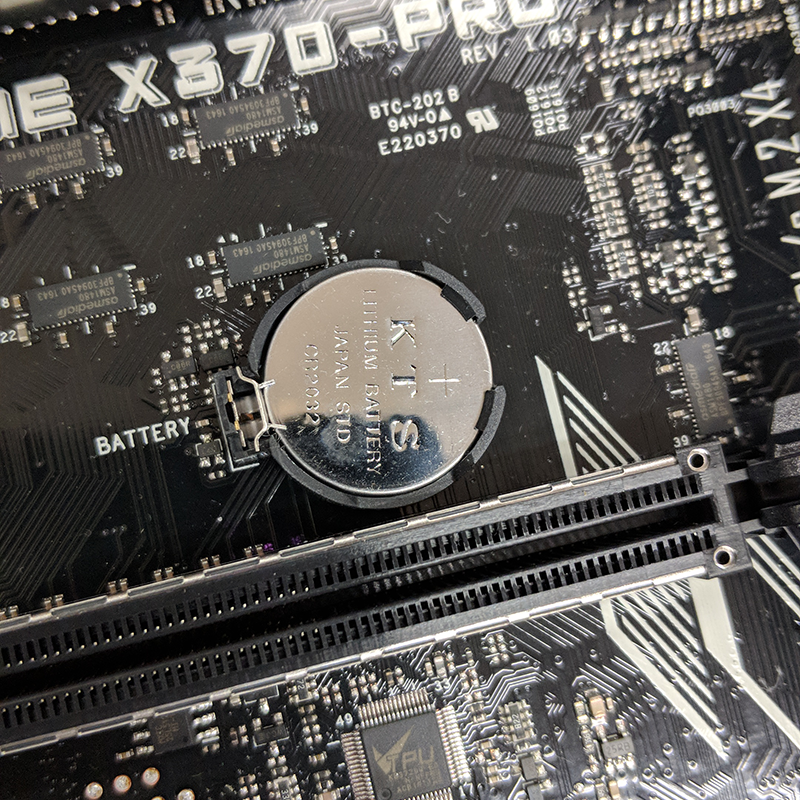
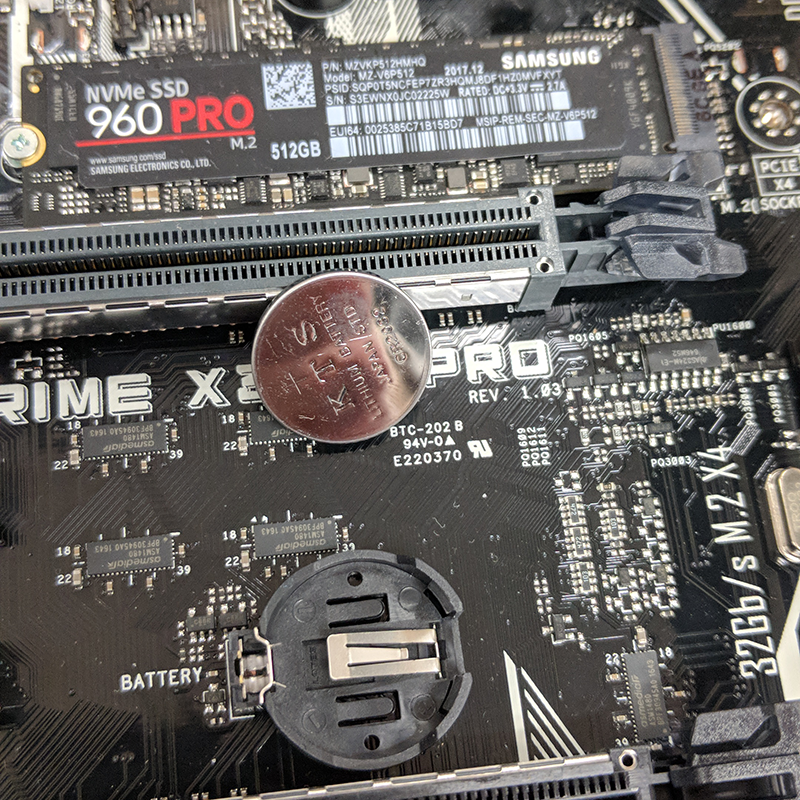
In a situation where your system isn’t POSTing clearing the CMOS can sometimes enable you to get back into the system for further troubleshooting. There are a few ways to go about this, depending on your motherboard. If you have a newer and fairly high-end motherboard, they often have a dedicated “Clear CMOS” button on either the rear I/O near the USB ports or on the motherboard itself, usually along the edges of the board. To use it, power the system on and then press the reset button. The system may power up and down a few times but if successful will bring you to a screen saying the BIOS defaults have been loaded and will prompt you to enter the BIOS. No matter how you clear the CMOS, you will see this screen if it works. The next method is a little trickier but still fairly simple. All motherboards have small groups of pins sticking out called jumpers that serve various functions. There is a special pair of jumpers that are dedicated to clearing the CMOS by connecting the two with a screwdriver. On most boards it will be labeled “CLRTC” or “clear real time clock”, another name for the CMOS. Where it’s located on the motherboard will depend on the model, but will generally be near the bottom edge. If you can’t find it, the motherboard manual will show its location. Once you’ve found it, make sure the system is powered off and get a small screwdriver ready (it can be either Philips or a flathead). Power the system on and place the screwdriver between the 2 jumpers so that it’s touching both at the same time. If done correctly the system will power up and down a few times before taking you to a screen saying the BIOS has been reset. The last method can potentially be more difficult, depending on the layout of your motherboard. The CMOS can also be cleared by physically removing the battery from the motherboard. First, unplug everything from the computer and then locate the CMOS battery. Depending on your motherboard it may not be immediately visible and could be under the video card or under a part of the motherboard. If you’re not sure, check the motherboard manual. Once you’ve found it, it’s held in a circular plastic container with a metal tab on one side. Using a small screwdriver press the tab and the battery should pop out. Now leave it out for about 30 minutes to let all power from the board drain out. Put the battery back in and reconnect all the cables and power the system back on. If it worked, you’ll see a message saying the BIOS has been reset.
Some situations where clearing the CMOS will not work may include a bad stick of RAM, a bad video card, bad motherboard or bad CPU.
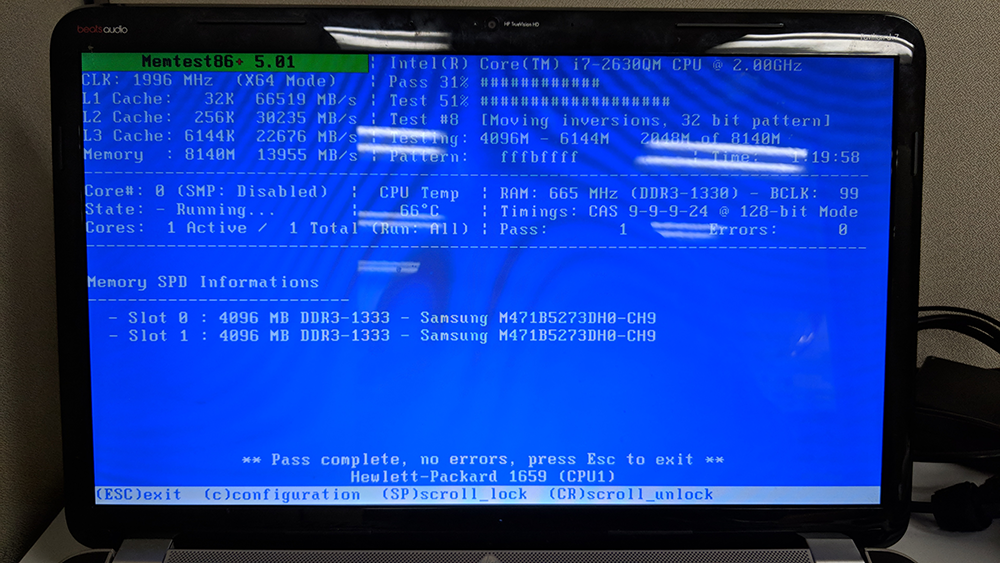
How to run Memtest86+ memory diagnostic tool
Estimated difficulty and completion time: up to several hours depending on amount of RAM, low to moderate difficulty.
If you suspect that your RAM is be going bad there is a handy utility called Memtest86+ that will test all the memory in your system and tell you how many errors it finds. It’s fairly easy to install and run, and once it’s running can continue without any more input until it’s done.
Generally speaking, as RAM gets older, it’s going to have more and more errors, but won’t always result in system instability. But if Memtest finds several dozen or even several hundred errors, then you will definitely want to consider replacing some of your RAM.
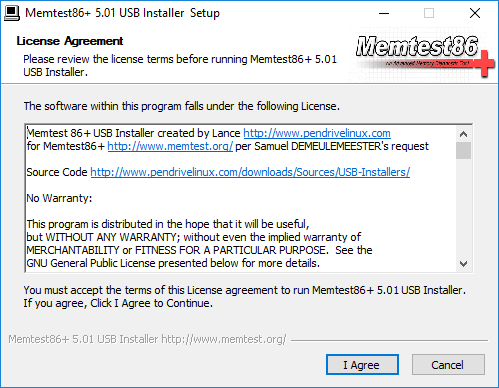
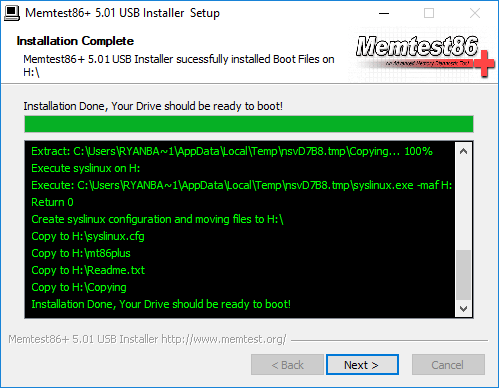
To use Memtest86+ you will need an empty thumb drive of at least 4 GB capacity. Download Memtest86+ (you can use either the pre-built ISO and burn it if you know how to use a program like Rufus or grab the Auto-installer version for simplicity) and install it to the thumb drive. It won’t take very long as Memtest86+ is a fairly small program. Once it is complete, close whatever program you used to install it and restart your computer. You can just leave the thumb drive plugged in to the computer for the entire process. Once your computer has started rebooting and you see the Velocity Micro logo, start pressing the boot menu key for your motherboard (F8 for Asus, F12 for Gigabyte and MSI) and select the thumb drive from the popup list.
NOTE: If you have UEFI enabled on your system, you may see 2 options for your thumb drive, one that says “UEFI” first and then one without. If you see the UEFI option, use that one.
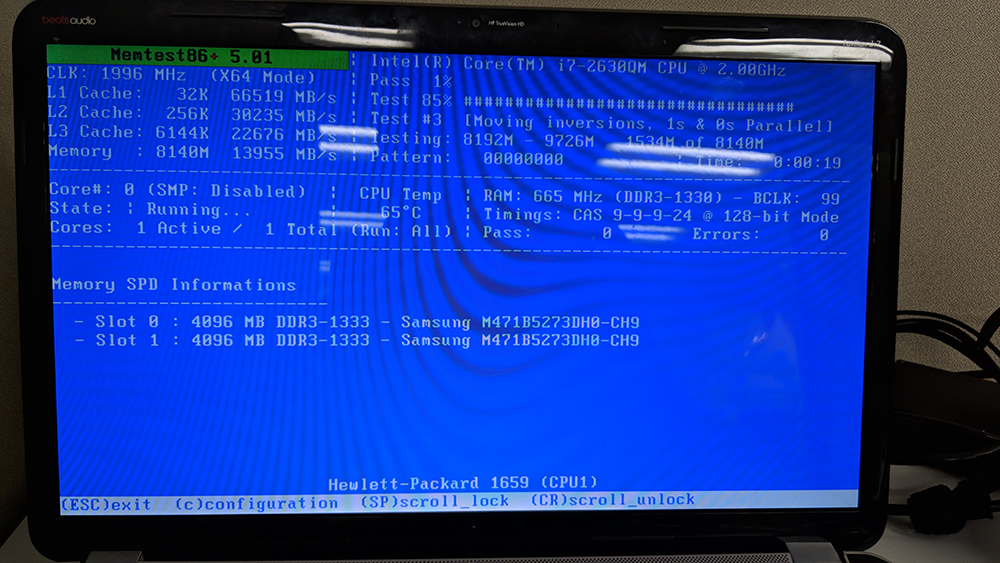
Memtest86+ will automatically boot up and ask if you want to change any testing parameters before it begins. It’s safe to leave everything as default and simply wait a few seconds and let it start itself. Memtest86+ will automatically start running and depending on how much RAM you have in your system, may take some time to finish, maybe even a few hours. We’d recommend letting it run overnight so that it doesn’t interfere with your work. On the right-hand side of the screen you will see how many errors Memtest86+ has found so far. Once the test has finished, it will give you the final count of errors found. Write down or take a picture of that number and contact our support team for further assistance. If Memtest86+ does not detect any errors, then there may be other issues with your system that are causing instability.

What diagnostics may I run on my solid state hard drive?
Estimated difficulty and completion time: 15 minutes, low difficulty.
Unlike conventional mechanical hard drives, Solid State Drives (SSD’s) do not use platters and write heads to store data. Instead, they use memory cells (called NAND cells) that use flash storage, similar to USB flash drives, to store their data. The advantages of solid state storage are lower power consumption, no spool up time, less heat output, and greater resistance to physical damage since there are no moving parts. Just like mechanical drives, though, SSD’s don’t last forever. An SSD’s life span is measured in terabytes written (TBW), or how many terabytes of data can be written to the drive before serious cell degradation occurs. Most SSD manufacturers have a utility available for their SSD’s that allows you to monitor the drive’s health, TBW, as well as check for firmware updates. Checking for new firmware is highly recommended, as newer firmware can extend the life of the drive.
Your Velocity Micro system should come preinstalled with the utility for your particular drive (Samsung Magician for Samsung, Crucial Storage Executive for Crucial, etc.). Simply launch the program through the Start Menu. For Samsung Magician, the first screen will be an overview of the Samsung drive in your system, with available firmware updates (if any), drive health, TBW, and some other links in the bottom. If you are using Crucial Storage Executive, it will show you the health and usage of all drives connected to your system, not just the SSD. NOTE: Most of these utilities will monitor the health and status of other drives present in the system such as mechanical storage, but they will not be able to do much more than monitor the health or perform a S.M.A.R.T. analysis. In the case of Crucial Storage Executive, there are more shortcuts to the left for drive details, S.M.A.R.T. analysis, firmware updates, as well as sanitizing the drive. One key difference in Crucial’s utility is the option to perform a live firmware update, or updating the firmware of the drive without immediately needing to reboot. Intel also has their utility, called the Intel SSD Toolbox, which has a very similar layout to Crucial Storage Executive.
One thing to note, however, is if you have two or more SSD’s in any kind of RAID setup, then none of these utilities will see the individual drives. If you have two Crucial drives in RAID 0, both Windows and Crucial Storage Executive will see it as a single “Intel RAID Volume” and will not be able to update the firmware of either drive. If you want to monitor the health of a RAID setup, then you will need to use the Intel Rapid Storage Technology.
NOTE: If you have an older Velocity Micro system you may have a Micron SSD rather than a Crucial. Crucial is a subsidiary of Micron, and they often simply rebrand Micron products with the Crucial name. One such product is Storage Executive, with both Micron and Crucial’s version able to work with the other. They are essentially the same program.
What do I do if my hard drive has corrupt sectors or my file system may be corrupt?
Estimated difficulty and completion time: up to several hours depending on size of drives and results of scans, low difficulty.
Signs that you might have a hard drive corruption or failure may include but are not limited to: Blue Screens of Death (BSOD’s), sudden application crashing, file corruption and Windows failing to start up occasionally. There are a few ways to fix or alleviate bad or corrupted sectors, but the older your hardware gets, the more frequently these issues will appear.
First, if your system is experiencing BSOD’s fairly frequently or having trouble booting into Windows, we suggest running a System File Checker (sfc) scan, which checks critical Windows files for corruption and fixes them, if possible. To do so, right click on the Windows Start Menu in the lower left of your screen and select “Windows PowerShell (Admin)” from the popup. NOTE: Depending on your settings it may say “Command Prompt (Admin)” instead. Either one will work. Once it is open, type “sfc /scannow” without the quotation marks. The scan will take some time to finish, and may give several different messages upon completion. If the scan seems to finish very quickly (3 minutes or less, generally) then that is a sign of corruption of Windows files. In any case, when it does finish it will give some output, usually one of 3 outcomes.
- Sfc scan found no integrity violations.
- Sfc scan found and repaired corrupt files.
- Sfc scan found corrupt files but was unable to fix some of them.
If you get result 1, then chances are that your Windows installation is not the problem. If you got result 2, restart your system and continue to use as normal but keep note of any more irregularities or instability. Even though sfc found and repaired errors, they may not have been the only cause of your issues. If you got result 3, then your system definitely has some Windows corruption. At this point, some of your options may be to revert to a previous Restore Point, to reinstall the bootloader (if you are having issues booting), or to back up your data and perform a fresh install of Windows.
If you would like to check your hard drives for any bad sectors or corruption, you can do so with the chkdsk /r command. To run a chkdsk, open a Windows PowerShell or Command Prompt as admin, and type “chkdsk /r” without the quotation marks. If you are trying to run chkdsk on your primary (C:) drive, note that chkdsk cannot run on any drive that is currently being used by Windows. The command prompt will tell you that a chkdsk will be run the next time the system boots. If you want to run the chkdsk immediately, simply reboot the system. After you see the Velocity Micro screen, the chkdsk should automatically start running. Depending on the size of your hard drive, it will take some time to complete. Once complete, the output will give you a rundown of how many bad sectors, clusters, etc. were found and repaired. The system will either reboot or continue into Windows. Continue to use your system as you normally would but keep an eye out for more issues that may arise.
Where can I look up a Bug Check Code or BSOD (Blue Screen of Death)?
Estimated difficulty and completion time: 30 minutes at most, low difficulty.
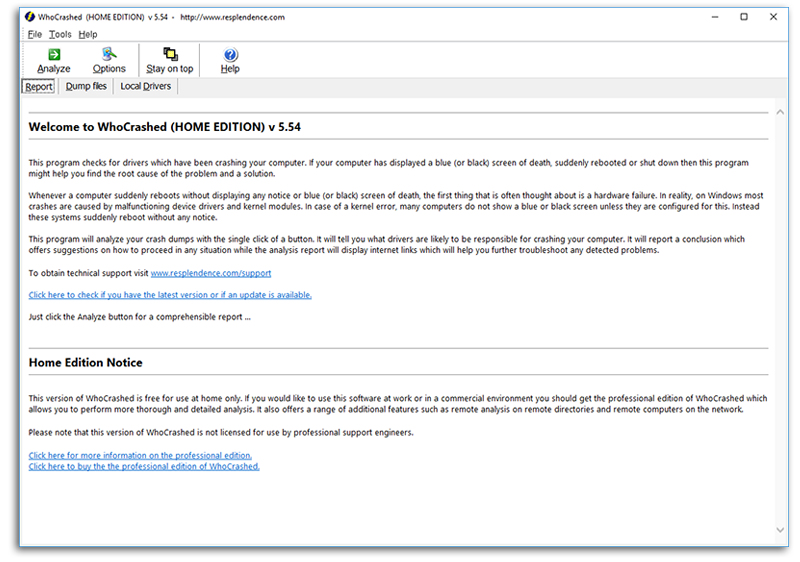
If your system encounters a Blue Screen of Death (commonly known as a BSOD), it can indicate that there could be a problem with either your hardware or some of your software. A bad stick of RAM, bad sectors on your hard drive, a failing CPU, or a bad Windows update among numerous other things can cause this error. If you encounter a BSOD, the first thing you should look for are the lines at the bottom that say “What failed” and “Stop Code.” These help tremendously when troubleshooting, so if possible try to take a picture of it or write down what it says. If you aren’t able to do either, there is another way to view the error message with an application called WhoCrashed which will allow you to view the crash dump files.
- Once you have WhoCrashed installed and running, click the analyze button in the top left. The scan will run for a few seconds followed by a message saying it’s complete.
- Scroll down until you see a section titled “Crash Dump Analysis”. There you will see the same message as the BSOD, “What failed” followed by “Stop Code.”
- It’s also possible that you will have multiple crash dumps on your system. If you continue scrolling down you’ll see the rest, if any.
If WhoCrashed says that there are no crash dumps on your system but you had a BSOD, it means that your system is rebooting before it is able to save the crash dump. This likely means that the issue is more hardware than software. If this is the case, then you will either need to make sure to write down or take a picture of the BSOD or call our support line.
In either case, if you have the stop code and component that failed, give our support line a call and give our technicians that information and they can help with further troubleshooting.
How do I backup my data?
Backing up your important data is something we highly encourage all of our customers to do. There are several ways to back up your data and many of them are fairly easy. As a reminder, Velocity Micro claims no responsibility for lost or damaged data. The customer is solely responsible for backing up their data prior to any service performed by Velocity Micro.
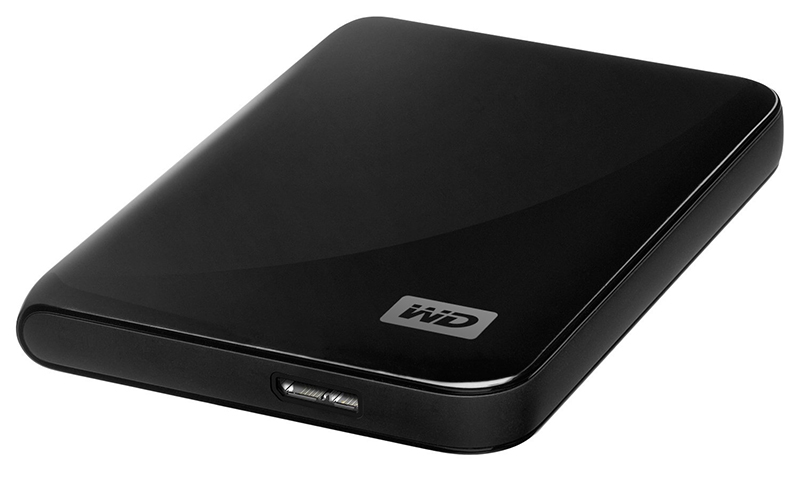
The first and easiest method of data backup is to simply buy an external hard drive and copy over important files on a regular basis. A 1 TB drive should be enough for most people, but larger capacities are available. Some external drives, like the Western Digital Passport, offer RAID 1 for even more data redundancy to create automatic, real time backups.
Speaking of RAID 1 (Mirror), RAID 1 is also a good countermeasure against data loss. Drives in RAID 1 have the exact same data, so even if one fails you still have a backup. RAID 5 and RAID 10 are also good for data backup but require more drives and should only be used with a dedicated RAID card. Setting up a RAID array for a system that did not initially come with RAID can be tricky, so we recommend contacting our support team first for assistance. Please note that RAID 0 (Stripe) arrays offer no protection against data loss. Since each drive only has half of the data, if one drive goes bad all of your data will be lost.
The second method for data backup is using a cloud service. These include cloud storage solutions like Dropbox or Onedrive, which require you to manually save whichever files you’d like backed up to those online folders. These options offer limited storage for those who use the free version but do offer larger capacities and backup options for premium users.
One other alternative is a fully automated cloud based backup solution. These can be configured to back up files and folders according to a schedule or whenever changes are made so the backups are always seamless and instant. Plus, by not having files backed up locally, you’re eliminating the risk of data loss from a catastrophic event like a flood or fire. There are several solutions out there, but we’ve found Carbonite to be the best balance of features for cost. Click here to download a free trial version.
Is it harmful to defragment my hard drive often?
You can defrag a spinning platter drive as often as you'd like with no real risks to overall drive longevity. However, because SSDs have a finite number of lifetime read/writes, defraging will degrade them over time and due to how SSDs store data, is generally not necessary anyway.
Files on an HDD Hard Drive become fragmented over time, requiring the disk to work harder and more slowly to access the various fragments. Defragmentation results in faster disk access and less work-load on the disk, but this requires the disk to work hard for a period of time to correct the mess. Some hold that frequently defragmenting a disk actually over-works the drive, but the alternative, a severely fragmented drive also stresses the drive. A happy medium is reached by using 3rd party defragmentation software with automated scheduling features that allow unattended defragmentation. Once defragmented, regularly scheduled defragmentation is performed very quickly because the degree of fragmentation is lower, stressing the drive even less. Hard Drives can and do experience part wear over time and failures can occur, but defragmenting a drive does not offer greater drive stress than various idle processes which run constantly when you are away from your system.
Apart from purchasing a solid state HDD which has no moving parts to fail, those users who are still concerned could follow the steps below.
- Monitor hard disk fragmentation over time
- Observe the fragmentation rate based on disk usage from their own personal computing habits
- Arbitrarily choose a personal fragmentation threshold, say 10% or 15%
- Determine how long it takes to defragment based on that threshold figure
- Arbitrarily determine a frequency at which to perform defragmentation
- After weeks and months of testing, adjust the threshold and frequency figures until you have reached a sweet-spot that you are personally comfortable with
What are the links for downloading the latest drivers for my computer?
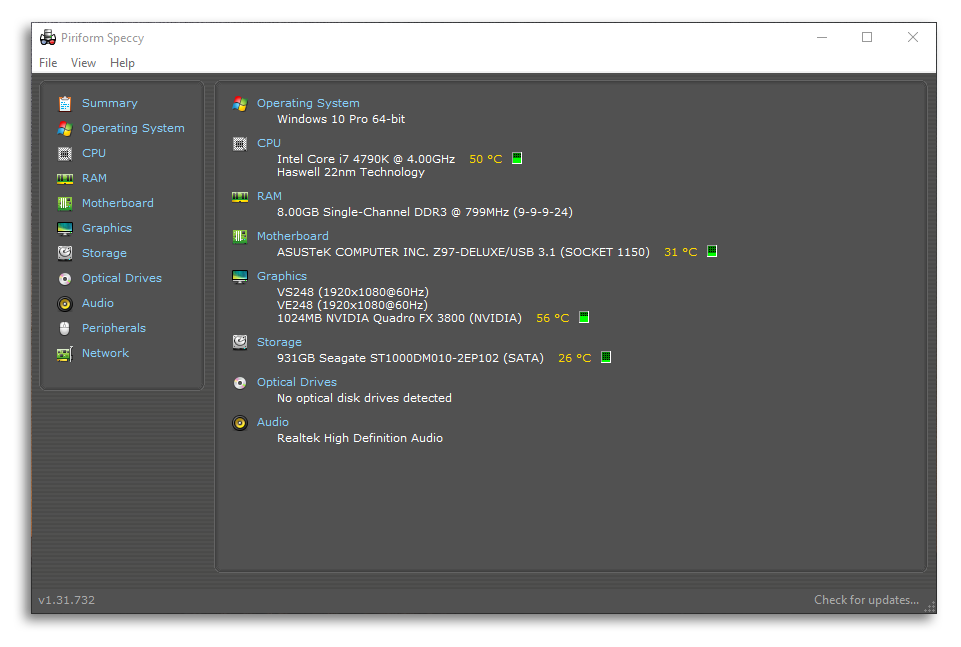
Keeping your drivers up to date can improve performance and add new features, as well as fix potential issues. Every component requires a specific driver, so the best place to get updated drivers is from the individual component manufacturer directly (e.g. if you have an Nvidia video card you should go to Nvidia's site to get the latest driver). This will ensure you always have the latest official drivers for your custom configuration. Unfortunately, because we offer so many different possible configs, it would be impossible for us to list each individual driver here.
If you are unsure what hardware you have, a good tool to use is a program called Speccy. Speccy will tell you nearly everything you want to know about your system, even the BIOS version of your motherboard. Download and install Speccy on your system, then run it and wait for a few seconds while it checks the hardware in your system. Once it's done, it will organize everything into categories such as "Motherboard," "Display," "RAM," etc.
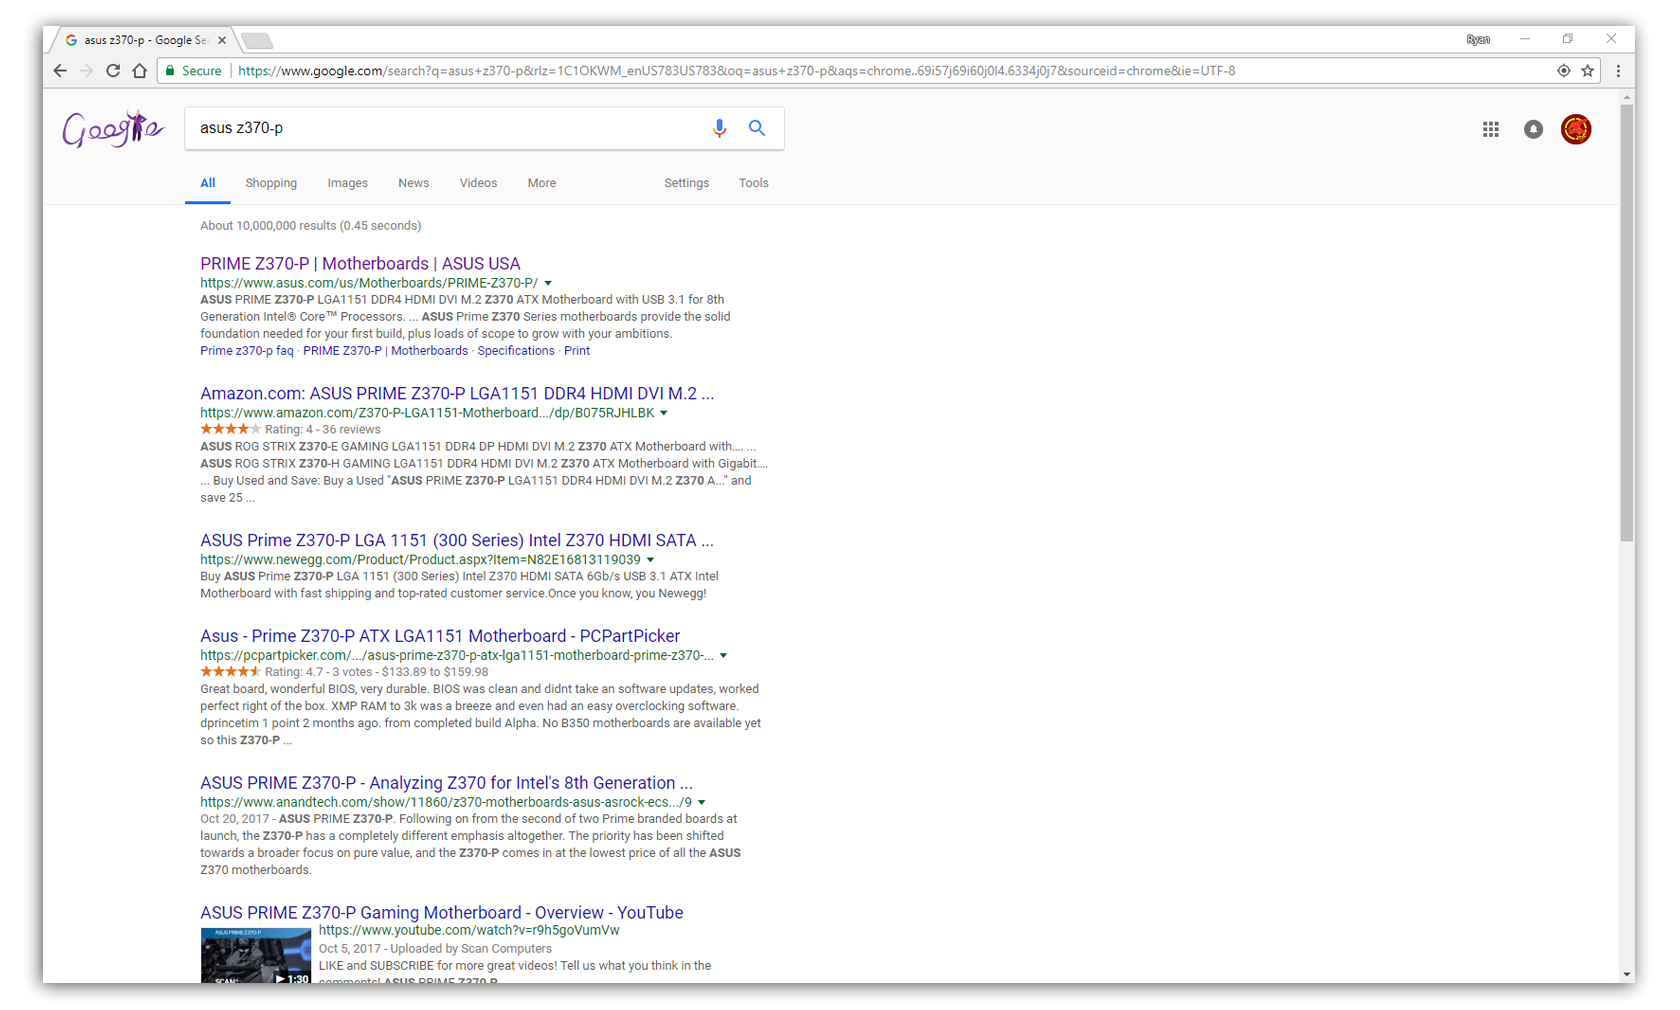
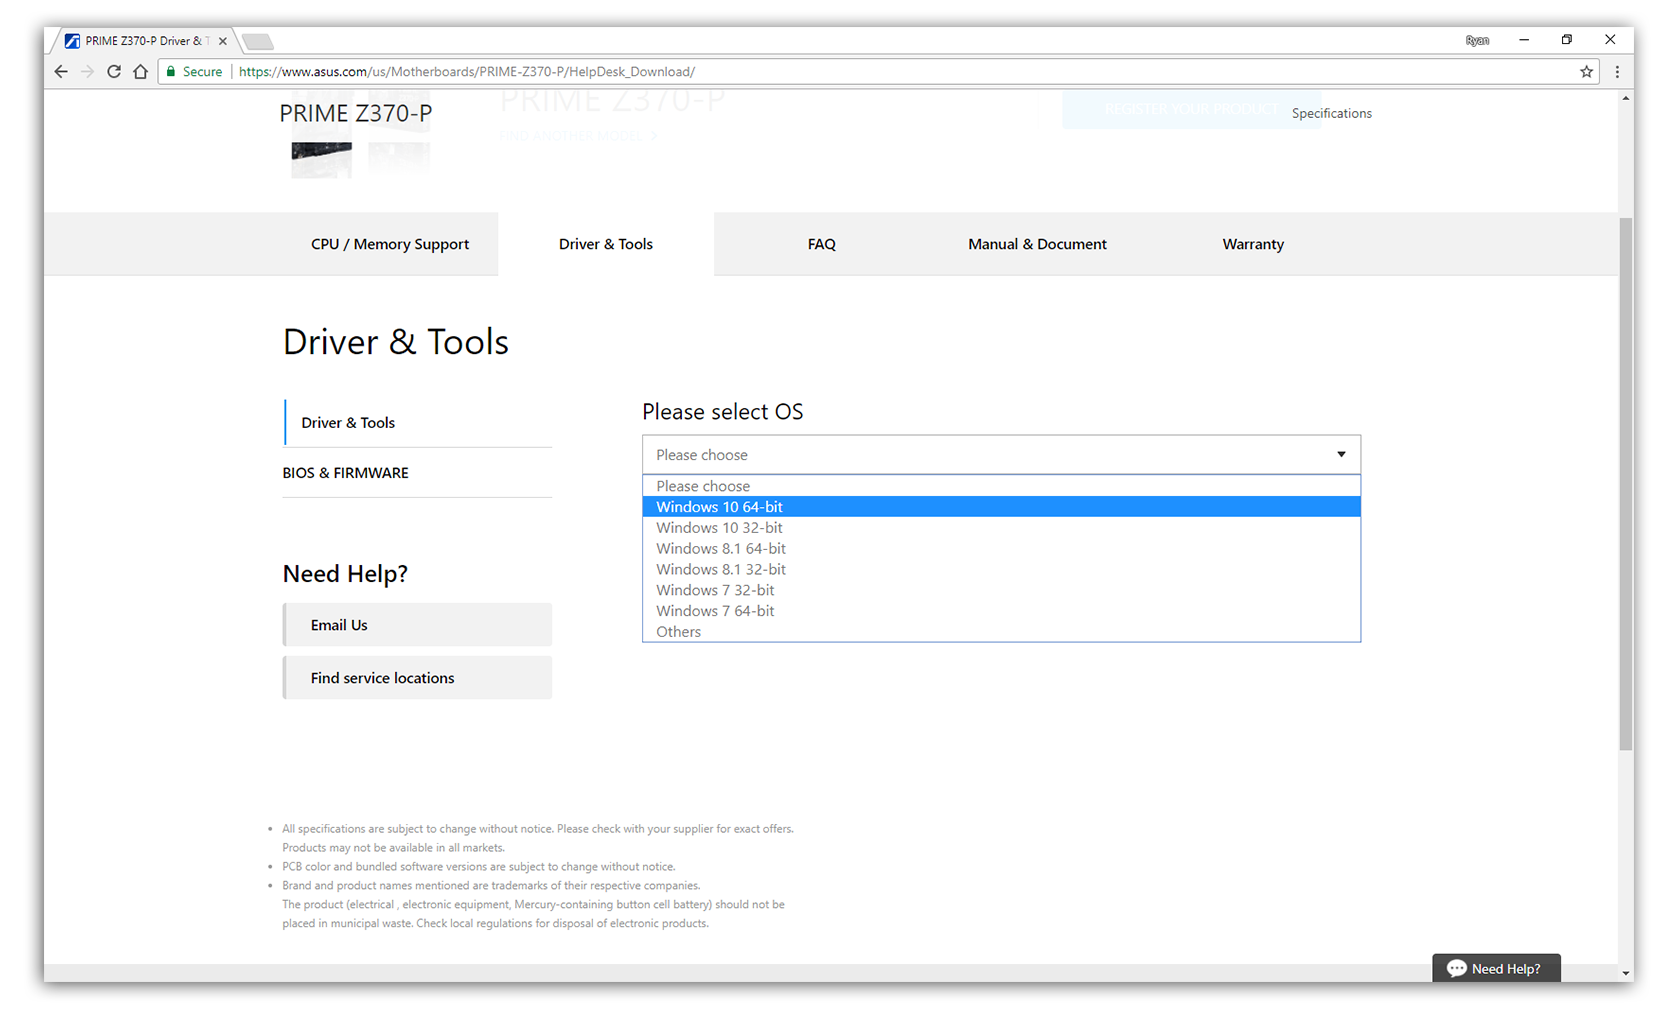
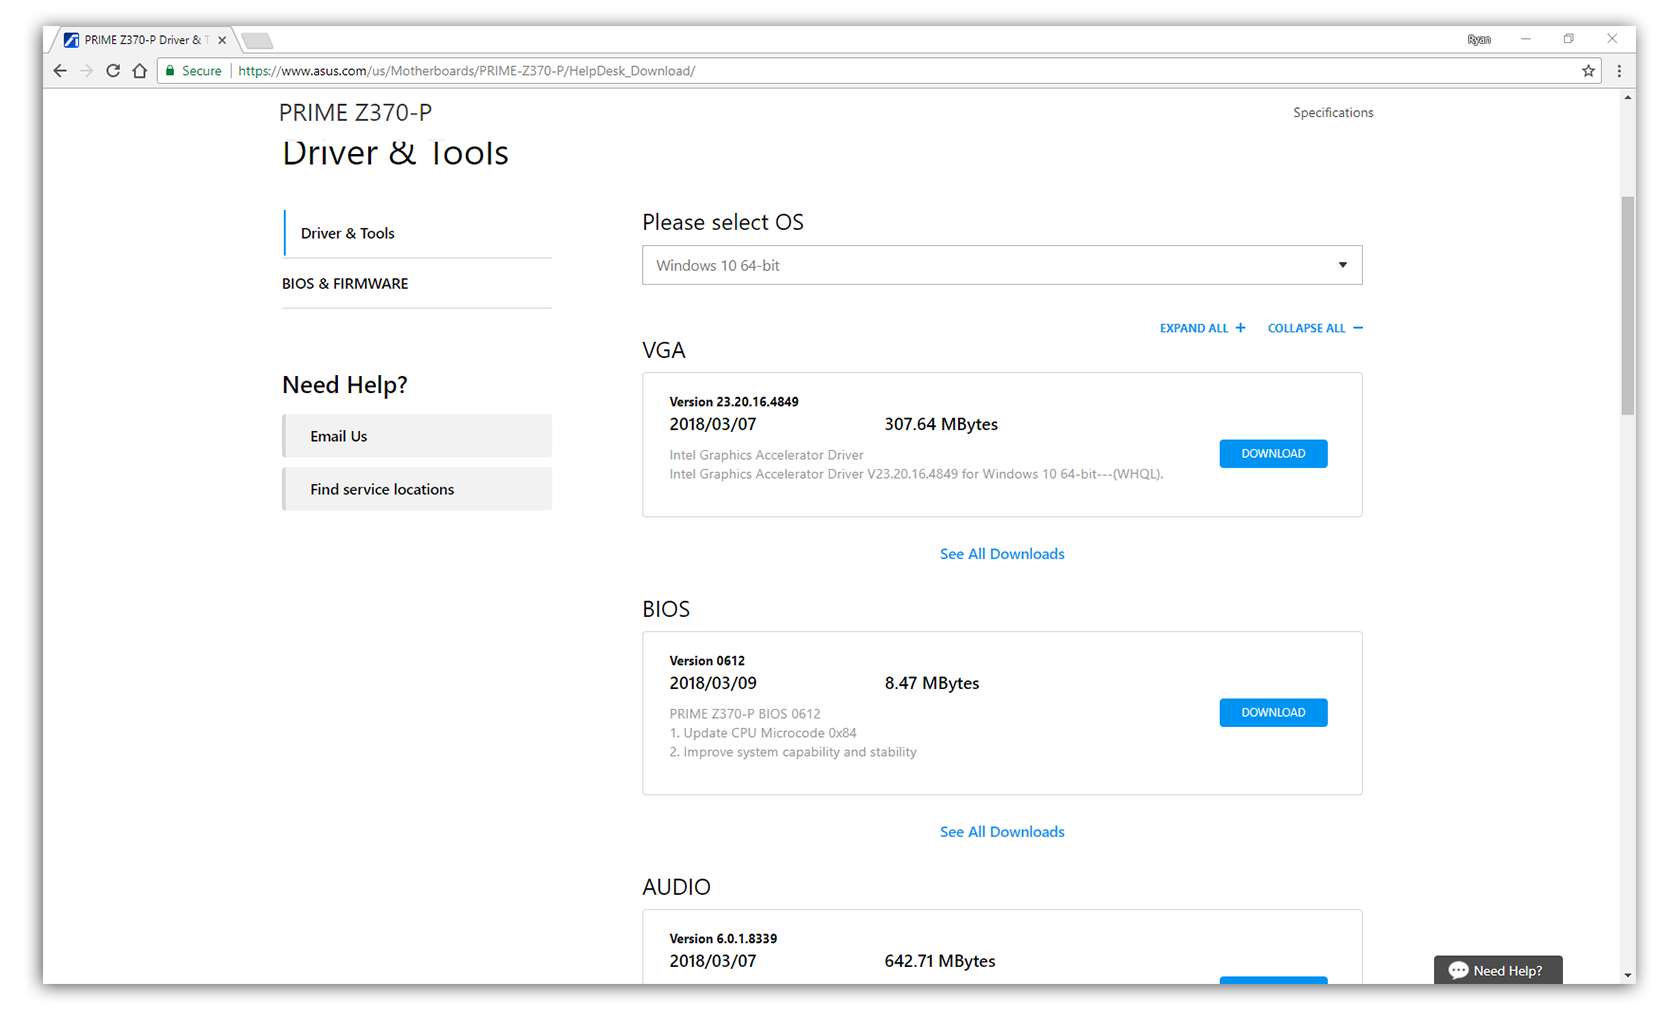
Most of the drivers that you may need to update will be available from the motherboard manufacturer's site. For example, if your motherboard is an Asus Z370-P, you can do a Google search for "Asus Z370-P drivers" and the first or second result should be what you need. The drivers that you should look for on the motherboard site are: Chipset (sometimes called INF), MEI (Management Engine Interface, sometimes called ConsumerME), LAN, WiFi and Bluetooth (if applicable), Audio, IRST (Intel Rapid Storage Technology, useful for RAID setups), USB (Intel USB 3.0 and Asmedia USB 3.0 and 3.1 are the most common, but others do exist), and RGB Lighting control (if applicable). There are usually other things available, such as utilities and manufacturer proprietary programs, but these are not necessary.
It's also worthwhile to check for firmware updates for SSD's if you have one. Check our guide on SSD diagnostics for more on this.
Other things that may need drivers include but are not limited to: monitors (especially 4K monitors), keyboards and mice (professional or gaming oriented), webcams, and audio or visual equipment. Check the respective manufacturer's site for updated drivers.
Why are games running slow and choppy on my new PC?
Estimated difficulty and completion time: up to a few hours for GPUTest if they get to that point, otherwise it shouldn't take more than 15 minutes to change game settings, low difficulty.
The first thing to check for is if your system meets the minimum requirements for the game you are trying to play. If it doesn't, find out what you need to upgrade and contact our support team. If you do meet the minimum requirements but only barely, then you may want to consider lowering some in game settings such as Anti-Aliasing (sometimes called FXAA, MSAA, SSAA, or CSAA), lowering textures and shadows, reducing draw distance, etc. The game won't look as nice, but the tradeoff will be much better framerates.
If you are well above minimum requirements and it still runs poorly, then there a few other steps you can try to determine the issue. If you have an Nvidia card, Nvidia sometimes releases an optimized driver for some games (especially AAA titles). These can greatly improve performance. You should definitely check the site for your video card (Nvidia or AMD) for the newest drivers.
If you have an SLI setup and your games run poorly, the issue may be SLI itself. While SLI can potentially double performance, in many cases it only offers marginal gains, and may even hamper performance. A game running well in SLI depends on whether the game supports SLI, if it is coded well to handle SLI, and if Nvidia has released an optimized driver. It is not uncommon for a game to run better on a single card, even in an SLI setup. If that is the case, you can temporarily disable one of your cards through the Nvidia Control Panel.
One other thing to keep an eye on is system temperatures. If the system is running too hot, it will slow down the CPU and GPU to cool down a little bit, but that takes away from performance. To check your temperatures, download a program called HWMonitor and leave it running in the background while gaming. Periodically use Alt+Tab to switch between the game and HWMonitor. HWMonitor shows a lot of information, but the two things to watch are your CPU and GPU temps. If the CPU or GPU is getting close to 90C or higher, then it is definitely too hot. If that's the case, then pulling off the side panel and looking to see if there is any dust buildup on the fans for the video card or CPU is the next step. If there is blockage, then use a can of compressed air to clear it out.
If none of the above seems to help, the last step is to determine if the issue is a single game or the video card itself. If only one game is running poorly, then that game is most likely the cause. At this point there isn't much that can be done other than waiting for an update to the game or a newer video driver. If the issue is persistent across several or all games or 3D intensive applications, the issue may be the video card. Download a program called GPUTest and run it on your system. When the program is open, check the box that says "Enable OSI (On screen information) and then choose the appropriate resolution for your monitor. Don't worry about setting anti-aliasing. Finally, click "Run stress test" and let it run for an hour or so. Things to watch out for are any kind of screen tearing or artifacting (unusual pixilation), screen turning black and then coming back on, Blue Screens or complete shutdowns, or system lock ups. If you experience any of these issues, give our support team a call and they will assist you further.
How to perform a clean install of an AMD video driver
AMD releases video driver updates periodically during the year. These updates are designed to improve performance. When manually updating your video card driver, it is best to perform a clean install of that driver, or removing the existing driver before installing the new. AMD has provided a way to do so in a few easy steps. Here’s how!
- Download the appropriate driver from the AMD website. Beneath the "Search AMD" box, you will see the link "Support & Drivers". Click on it. On the next page, you will need to select the Component Category (Desktop Graphics for PCs, Notebook Graphics for Notebooks), Product line (most likely Radeon HD series), Product Model (check the side of your video card – should start with a 3, 4, 5, 6, or 7) and the Operating system (ex. Windows 7 64-bit, Windows XP 32-bit, etc.) Click on "View results".
- The next page holds the AMD Catalyst™ Display Driver for your system’s video card. The "AMD Catalyst Packages" will be to the front. Click on the top "Download" button, and choose to save the file. Locate the saved driver download, and double-click it to run the application. You will be prompted to choose a destination folder for the driver installation files. Click the "Install" button, as the default location will be fine. Setup will begin once the driver installation files have been copied to the save location. Click "Next" on the Welcome screen.
- The next screen contains the Installation options. Click on the button next to "Uninstall". On the following screen, click on the radio button next to "Custom", and then click "Next." On the next screen, click on the "Select All" button then click "Next". Your screen will go black for a few seconds while the current driver is being removed. This is normal. The uninstall will complete automatically, and prompt you to reboot. Do so.
- Once the system reaches the desktop again, you will need to locate the video driver setup file in order to restart the driver installation. Click on Start, then Computer. Locate the AMD folder, and double-click it to open. Double-click on the Support Folder. Double-click o the next folder (it will have the same name as the driver file downloaded earlier). Finally, double-click on the Setup application to begin the installation.
- Click "Next" on the Welcome screen. The next screen contains the Installation options. Click on the button next to "Install".
- On the following screen, click on the radio button next to "Express", and then click "Next." Accept the license agreement.
- You will be asked to specify the folder to install to. Click the "Yes" button, as the default location will be fine.
Sit back and relax while setup installs the new driver and other components. Your screen will go black for a few seconds while the new driver is being installed. This is normal. You may also be prompted to restart the system once or twice during the process. This is also normal. Once the driver’s installation has completed, click the "Finish" button, and your system will be ready to use.
How to fill and maintenance a custom loop liquid CPU cooler
Custom loop coolers can be intimidating. It's no secret that getting water on your components is a no-go, but the process of filling or draining a custom loop, given the right tools and knowhow, is perfectly simple, quick and easy. We've prepared a video to help guide you through the process as well as a writeup on the process below.
YOU’LL NEED :
Liquid Coolant Filling Bottle
Liquid Coolant (of your choice)
We recommend keeping a rag around in case of emergency, or if you happen to drip coolant in your case during the reservoir filling process.
- Pour the coolant of your choice into your reservoir filling tool. Open the inlet at the top of your cooler’s reservoir. Then, hook the tip of the tool into the reservoir and squeeze.
- Continue filling the reservoir until it reaches about 80% capacity, 4/5ths of the way filled. Then, flip the switch of your PSU to cycle the fluid out of the reservoir and into the loop.
- Only the cooling loop should be plugged into the PSU. Constantly turning on and off the PSU can disrupt the boot order and is unhealthy for your system’s motherboard and components. *
- Once the reservoir has drained the coolant into the loop, turn off the PSU and repeat this process until you’ve filled the loop completely, or to the manufacturer’s specifications.
- For regular maintenance, the coolant in your loop should be drained and replaced about every 2 years. You can remove fluid using the same tool, or the outlet valve.
*Having your PSU disconected from all but the cooling loop is best for this process. If you have a modular PSU, this is especially simple - just disconnect everything but your cooler from the PSU on its end, so you can simply reconnect everything in one place once the process is complete. Having some fans kick on durring this process is perfectly fine, but it's really important for your things like your motherboard to stay disconnected to prevent the aforementioned boot order from being dirupted. It'd almost be as if you subjected your motherboard to a series of power outages - and there's no reason to. Take the time to disconnect it durring this process.
Some important notes on the process:
1. If it’s your first time completing this process, don’t be afraid to line your PC with
paper towels. Liberally. Even a droplet can cause a short circuit.
2. Do NOT keep the pump running while empty in-between fills. It’s no good for the
health of the pump. It’s best to cut the power as soon as you see the reservoir get low.
3. The outlet valve at the bottom of your reservoir will likely accept the same tubing
the rest of the loop utilizes. Use an additional piece of flexible tubing for easy draining.
4. Take it easy, refer to the written manual and video tutorial, and you’ve got this!