How to Reconnect the Power Connections in your PC
Sometimes it may be necessary to unplug some of the power cables in your Velocity Micro computer, either for troubleshooting purposes or for hardware upgrades. For clarification, “power cables” are the connections coming out of your power supply to power the motherboard, hard drives, and video card. These will include: ATX 24-pin connector, CPU 4/8 pin connector, PCIe (sometimes labeled VGA) 6/8 pin connector, SATA power cables, and Molex connectors. Molex connectors are rarely used these days, however some expansion cards (such as a USB 3.0 card) use them for additional power.
Note: Our technicians often secure loose cables and slack by using zip ties to clean up the wiring so you may have to snip these wires if you need extra cable length. If you have your own zip ties, feel free to use them, but they are not required.
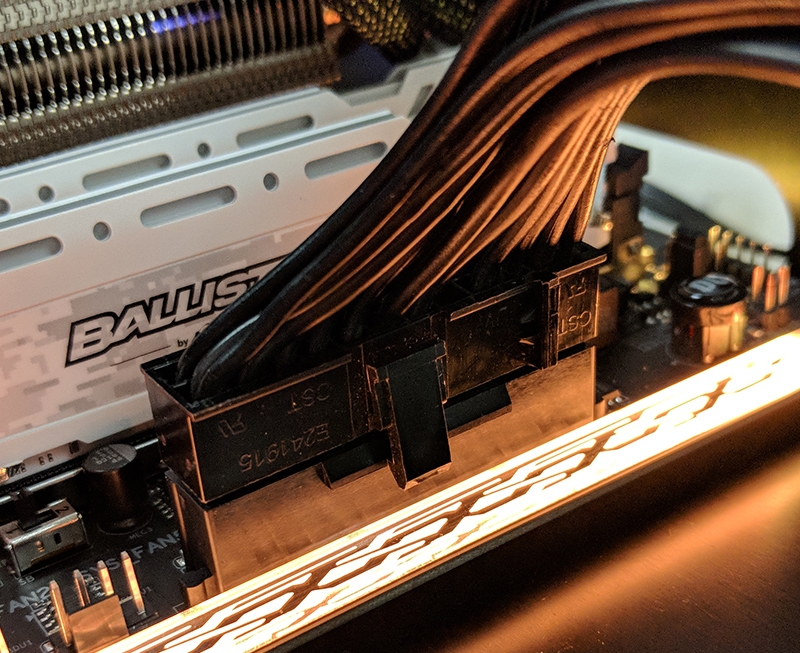
Most power supplies are either non-modular or semi-modular, with higher-end ones being fully modular, meaning you can add or remove individual cables as needed. For example, if your system only has one video card and you only need one cable for it, you can leave the rest unplugged and use them later if needed. If your power supply is non-modular, then you are not able to add more connections as needed. The process for disconnecting and reconnecting power cables is pretty much the same across all of Velocity Micro’s case designs. The only variable is how much room you have to work with. For 24-pin, PCIe and CPU power connectors, there is latch on the connector and a latch catch on the receiving connector. Bear that in mind when reconnecting these three.
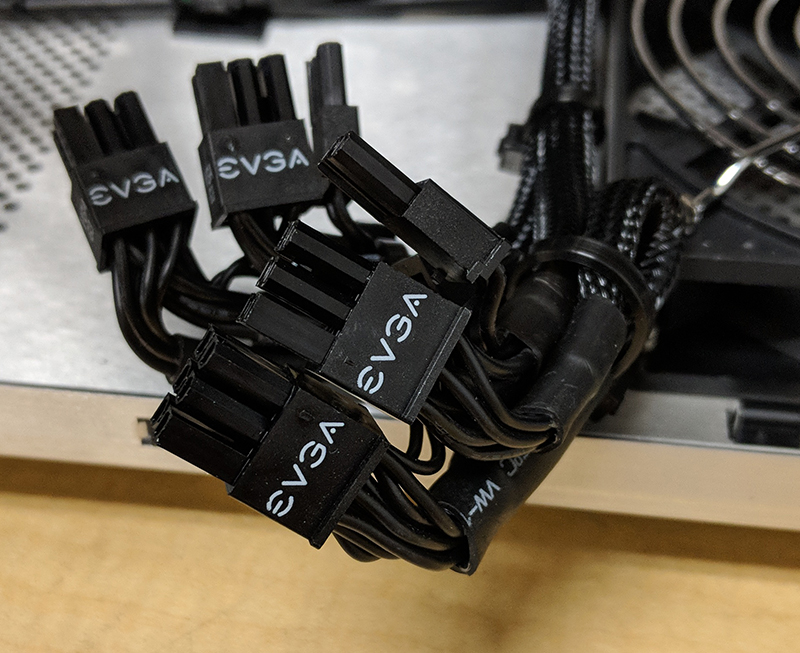
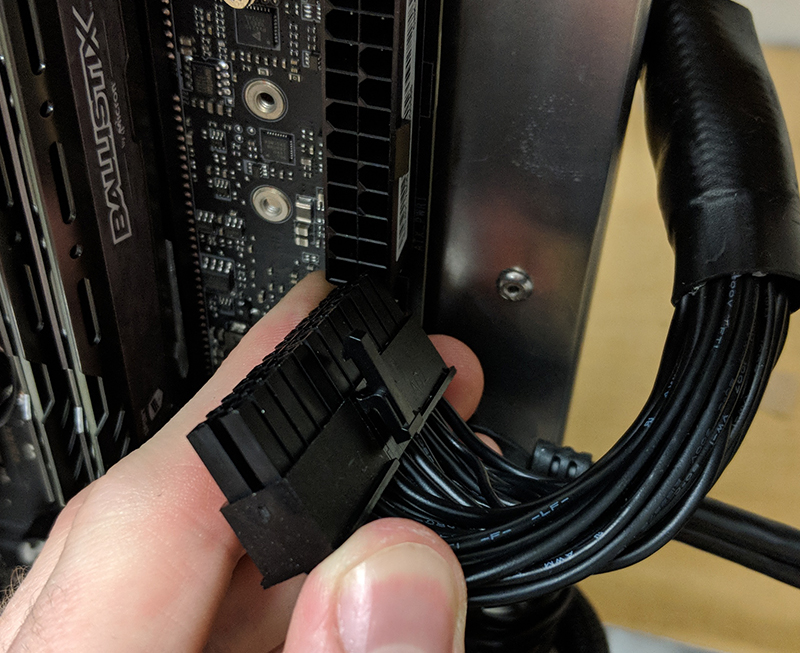
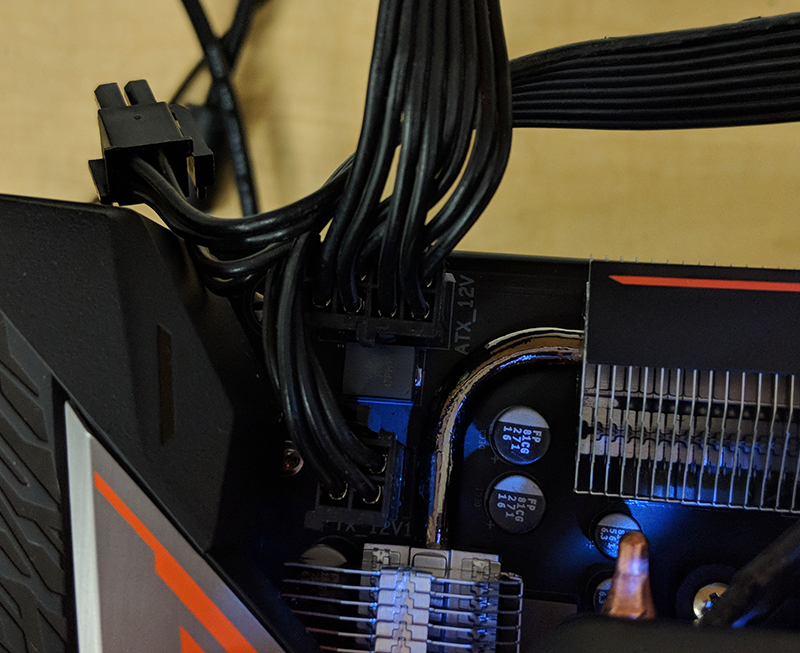
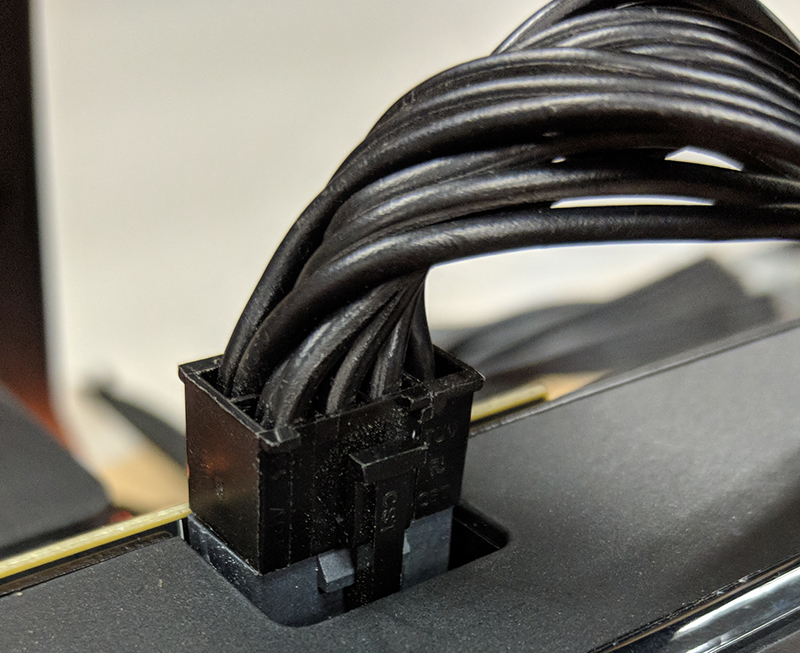
Start by removing both side panels and setting them to the side. Now, with the motherboard facing you, start by removing the power cables for your video card. Modern power supplies have PCIe cables that can either use 6 pins or 8 pins. Usually, two of the pins can separate and go unused if you don’t need them. If you have a VX or a GX4 case, then you may have two video cards, so make sure to unplug both. Also, depending on the video card, you may have to unplug an 8-pin and 6-pin connector. Both will have a small latch on either the top or the bottom that you will to squeeze in order for it to release. Squeeze the whole connector and gently pull it towards yourself. It should slide out without too much trouble. You can leave the cables hanging as they are and move on to the 24-pin connector. The 24-pin is almost always on the upper right side of the motherboard. Like the PCIe cables, there is a latch that holds the connection in place that needs to be released. This time it’s on the right-hand side facing away from the board. It may be hard to see, so try to feel it with your fingers if you can. Squeeze it so that you can feel it release and pull straight back from the board. You may need to gently rock it side to side to work it out. Once out, you can leave it hanging loose as it is. One thing to be aware of is that some 24 pin connectors have a section of 4 pins that can separate from the rest. This is for compatibility with really old motherboards, but that’s irrelevant for this guide. Not all 24 pins have this feature, just be aware that yours may. Next, we will need to unplug the CPU power cables. Similar to the 24-pin and the PCIe cables, the CPU cable can split in half to be a single 4-pin or join together to become an 8-pin. On many higher end boards, especially full size ATX or E-ATX ones, there will be an 8-pin and a 4-pin, or even two 8-pin connectors. As a general rule, CPU power connectors on the board are usually in the upper left corner and depending on what kind of CPU cooling you have may be difficult to get to. Also, like the 24-pin and PCIe cables, there is a latch that needs to be released before it can be removed. Squeeze the latch and gently pull the cable straight out.
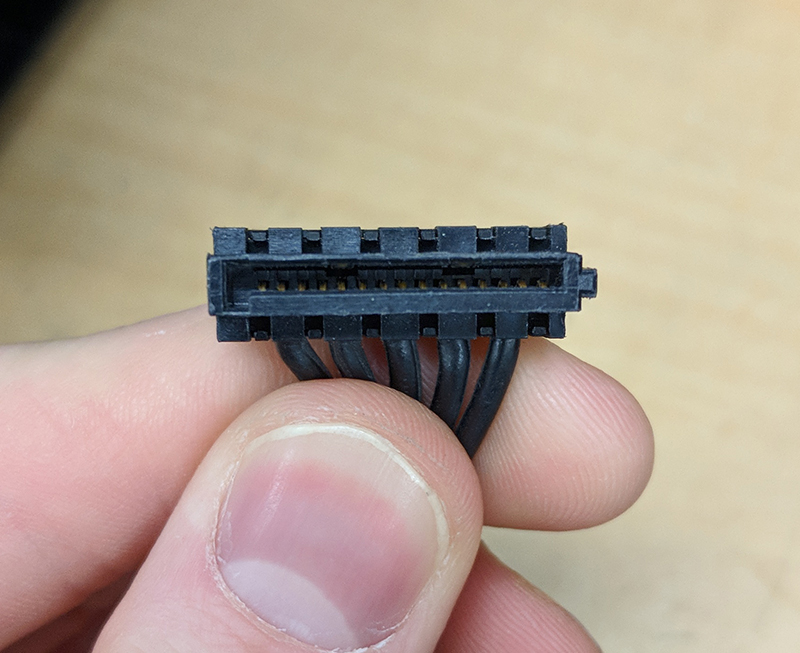
Next, we’ll go over how to remove SATA power connectors. These are much easier to remove as they have no latches and just pull straight out. SATA power connectors are flat and narrow and have a distinctly “L” shaped connector. Make sure you have it oriented the correct way when reconnecting to your drives.
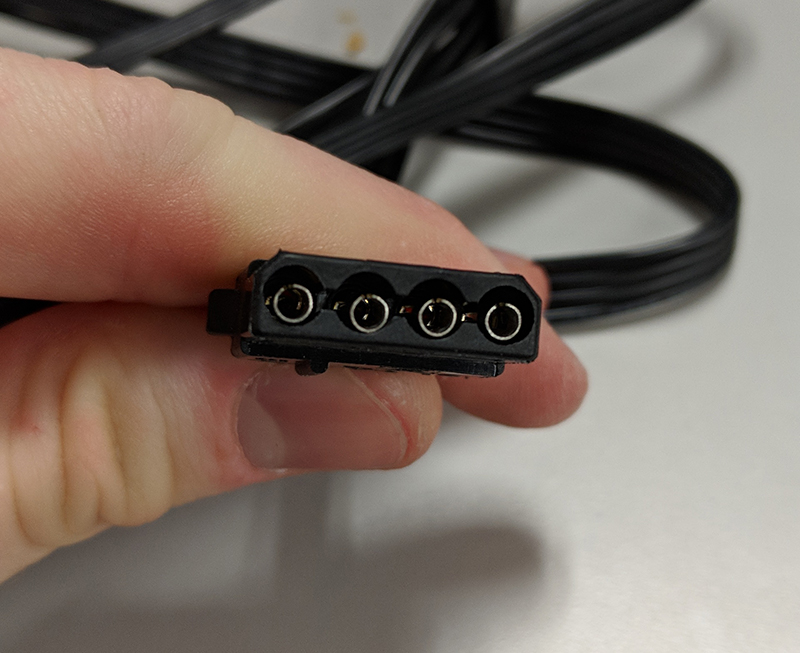
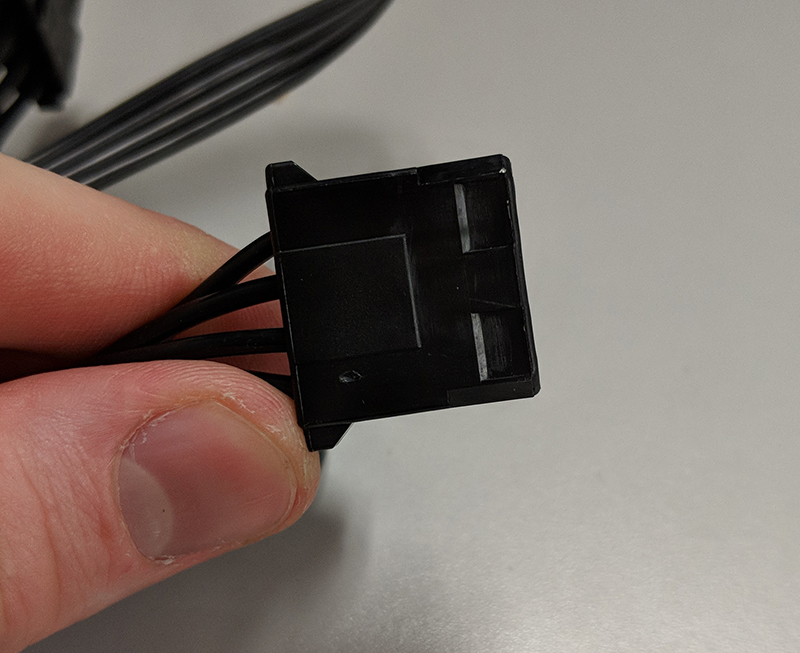
Lastly, there is the Molex connector. Molex is a very old standard that was mainly used to power PATA (also called IDE) hard drives and optical drives but is still occasionally used for things that need a constant supply of power (unlike newer connections that adjust their voltage based on demand). The only thing you are likely to see using a Molex connector is a USB 3.0 add in card. In any case, a Molex connector has four circular barrels arranged side by side. This part of the Molex is the “female connector.” Unfortunately, these have a tendency of becoming misaligned, so it may be necessary to use a small screwdriver head to adjust them. The male receiving end has four pins that will line up with the four barrels. Make sure to pay attention to the shape of both the male and female ends; one side of the Molex will be flat while the other has angled corners. Double check that you have aligned properly.
As stated in the beginning of this guide, you may have additional cables in your accessory bag if your power supply is either modular or semi-modular. These can be used to add additional drives or video cards or even upgrade your motherboard. If your power supply is not modular, then you will be limited to what cables it already has. If you would like to upgrade your power supply, please contact our support team.