How to Set Up Multiple Displays
Estimated difficulty and completion time: 15-20 minutes, low difficulty.
Using multiple displays can dramatically increase your productivity or give you a more immersive gaming experience. Most video cards can support at least 3 separate displays, while high end cards can do as many as 6.
- Before connecting your monitors to your video card, make sure your system is off first. Connect each monitor to the appropriate video out port (for assistance, see our How to Connect Your Monitor tutorial). Boot the system. NOTE: The Velocity Micro logo may only show on one screen - that is normal. The Windows login screen may also do the same.
-
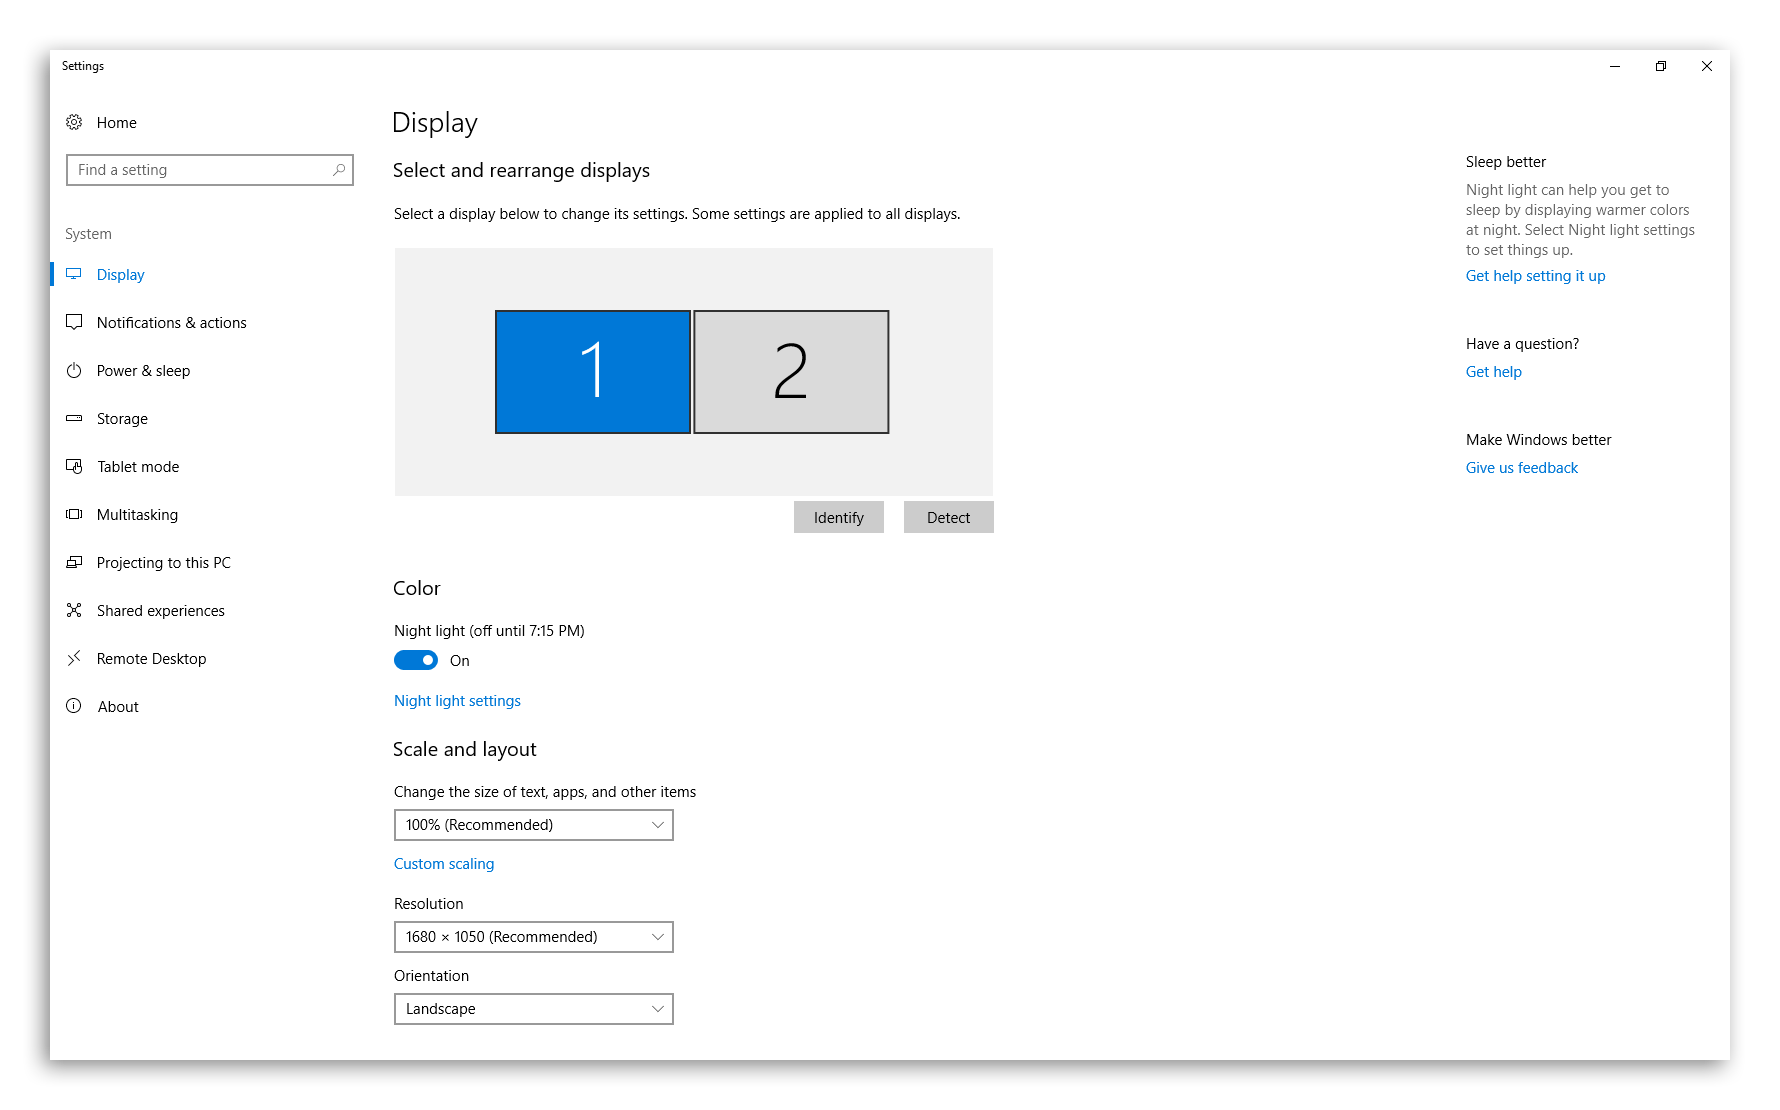
Once in Windows, you will need to adjust the placement of your monitors through the Windows Display Settings. To do this:
- Either right click anywhere on the desktop and select "Display Settings" from the context menu, or left click on the Windows Start Menu in the bottom left of the screen and type "Display Settings" and press enter.
- A window should pop up with a graphical representation of your connected monitors. If you have 3 monitors connected, there will be 3 monitors shown in the box. You may notice that the arrangement of the monitors may not be the same their arrangement on your desk, i.e. Windows may think that monitor 1 is on the right when it is actually on the left. Since physically moving your monitors may not be feasible, Windows allows you to drag and drop the boxes to match your setup. If you're not sure which monitor is which, the button labeled "Identify" will show a large number to appear in the lower left corner of each screen.
- Once you've moved all the monitors to their correct positions, click "Apply" to save your changes. To make sure that everything is right, move your mouse from one monitor to the next. Assuming everything worked out, you should be good to go.

