How do I clear the CMOS on the ProMagix B50?
You will need a small Phillip's head screwdriver to complete this task.
- First disconnect the AC Adapter and remove the battery from the notebook.
- Turn the closed notebook over onto its lid with the empty battery compartment facing you.
- Remove the 4 screws surrounding the memory cover in the center of the notebook.
- Remove the RAM module closest to you (the lower of the two) if it is installed. To do this, push the metal retaining clips at either end of the module away from the chip to free it, and then lift it out of the slot.
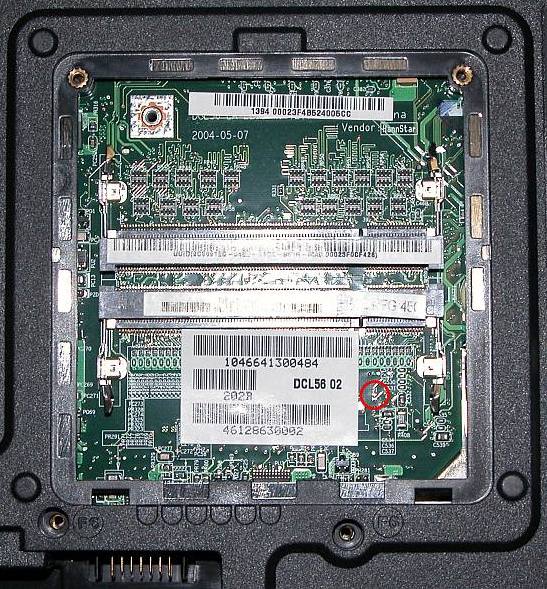
- Locate the J1 junction in the printed circuit board just to the right of the white bar coded sticker (circled in RED in the image below). Notice that there are two metal halves in the junction that do not quite touch one another. Press the tip of your screw driver into the junction to bridge the gap and hold for 60 seconds.
- Reinstall RAM if necessary and return cover and screws. Reinstall battery and reattach the AC Adapter
- On the first boot attempt, a "CMOS CHECKSUM ERROR" is to be expected and is normal after clearing the CMOS. Ignore this error and continue booting as normal.